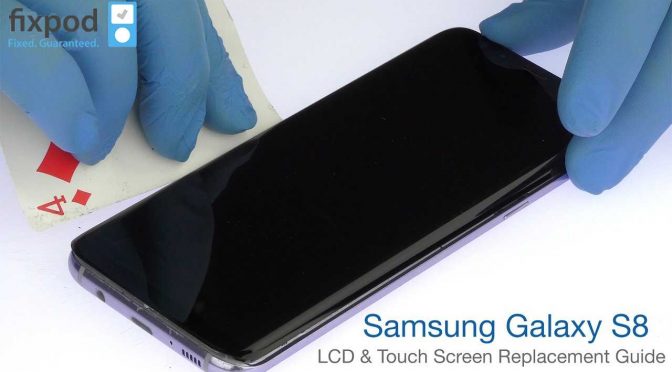
Have you dropped your phone? The screen has broken? Now looking for a Galaxy S8 Screen replacement?
Here is an ultimate guideline: how you can repair your Samsung Galaxy S8 Screen and Samsung Screen Repairs Cost
Tools you need to buy:
1.iOpener/HeatGun
2.Suction Handle
3.Opening Picks(6 sets)
4.Spudger
5.Plastic Cards
6.Tweezers
7.Screwdriver
Parts you need to buy:
1.Galaxy S8 Screen Assembly
2.Galaxy S8 Display Adhesive Strips
3.Galaxy S8 Display Heat Dissipation Stickers
4.Galaxy S8 midframe
5.Galaxy S8 Rear Cover Adhesive
6.Tape
Step-1: iOpener Heating
*We recommended that you to use a microwave for heating the iOpener.Please
clean the microwave and make sure that there is no nasty gunk inside the microwave.
*Place the iOpener in the center of the microwave.

Warning: If your microwave is a carousel one, make sure that the plate spins smoothly. In case your iOpener gets stuck, it may overheat and burn.
*Heat the iOpener for 30 seconds.
*As the iOpener cools, reheat the microwave for an additional 30 seconds.
*Warning: Do not overheat the iOpener during the process. Overheating may cause the iOpener to burst. Be careful to touch the iOpener if it is inflated. If the iOpener still too hot to touch, let it cool down before reheating. It may take 10 minutes.
*Remove the iOpener from the microwave. To avoid the hot center hold it by one of the two flat ends.
You can do same think using Heat Gun:
Step-2: Backglass Assembly
*Have a replacement adhesive ready before you proceed. Because opening your phone will compromise its waterproof marks.If you want to reassemble your phone without replacing the adhesive take care to avoid liquid exposure.
*Heat the iOpener and apply it to a long edge of Galaxy S8 for about 2 minutes. You possibly need to reheat and reapply the iOpener for several times to get the phone warm enough.
Warning: Never overheat the phone. Because overheating may damage the OLED and internal battery.
#Now it’s time to cut the adhesive around the edge of the rear glass panel.
*Warning: Avoid prying here to protect the fingerprint sensor.
*Apply a suction cup as close to the heated edge of the phone once the back panel is warm enough to touch.
*Warning: Avoid the curved edge, because the suction cup will not make a good seal on the curved portion of the glass. If your phone’s back cover is cracked, the suction cup may not stick. Try to lift it up with strong tape or superglue so that you can proceed.
*Lift on the suction cup and insert a halberd spudger under the rear glass. Rather than inserting parallel to the plane of the phone, you will be pushing up as the glass curved.
*Reheat and reapply the iOpener to soften the adhesive after inserting the tool properly into the glass.
*To separate the adhesive slide, an opening pick or a blade of Halberd spudger downside of the phone.
*Warning: Do this process slowly so that the tool doesn’t slip out of the layer.If this cutting process seems difficult to you then reheat and reapply the iOpener.
*Repeat the previous heating and cutting method for the remaining three sides.
*To prevent the adhesive from resealing, leave an opening pick on each side before you move on to the next side.
*Disconnect the fingerprint sensor cable, which connects the phone to the rear glass near the main camera while you are moving to the rear glass. Be careful, because the cable is very short.
*Warning: Peek in and make sure that the orange cable with a blue connector has disconnected as you lift the glass.
*If any adhesive remains there, remove it by slicing an opening pick and then open the phone slightly.
*Warning: Do not open the phone if the fingerprint sensor cable seems snagged. Before proceeding, disconnect the connector with the point of a spudger.
*Note: In order to reconnect the fingerprint sensor cable, you have to angle the back cover into position until the cable connector lines up perfectly over it’s socket. Use the flat end of the spudger to gently snap the connector into place by pressing it straight down.
*Remove the glass of the phone.
*Step:4: Installing the new back cover
*If any adhesive remains there, peel them away with tweezers. Then clean it up with high concentration isopropyl(90% or higher)
and a lint-free cloth or coffee filter to prepare the surface for the new adhesive.
*Peel the sticky element at the back of the new rear glass, line up one edge of the glass against the phone chassis and firmly press the glass onto the plane.
#How to reinstall the old back cover
*Turn on your phone and test your repair before installing new adhesive and resed the phone.
*Heat the back cover and apply pressure to secure it after installation.
*Step 5:NFC Antena and charging Coil Assembly
*Remove the eleven 3.7mm screws, NFC antenna and charging coil assembly.
*Step-6: Battery connector
*Disconnect the battery connector by using the flat end of the spudger.
Step 7:Screen
*Disconnect the display and digitizer connector by using the flat end of the spudger.
*Some more words:
*When you will insert the opening picks into the side of the phone, insert a long edge of the opening pick instead of a point to avoid putting extra pressure on the screen.
*Warning: To prevent the damage of front-facing sensors and earpiece speaker use a little extra caution while you are prying near the top edge.
Step-8:
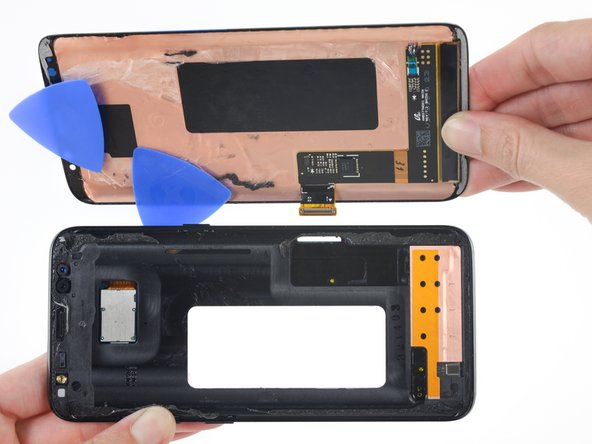
*Use a plastic card to pry the screen away from the midframe.
*Check the back part of the phone and detect the display and the digitizer connector. Pry on the opposite side of the phone from the connector. The connector will act as a grip.
Step-9:
*Lift the screen assembly carefully away from the midframe. Then gently pull the display connector through the hole in the midframe.
*Remove the screen assembly.
*Remove all the traces of the old adhesive before installing a new display. You need to take special care to remove any small glass fragments.
Step-10:
*After removing all the traces of glue and glass from the frame, you need to clean the adhesion areas with isopropyl alcohol(90% or higher) and lint-free cloth or coffee filter.
*Warning:If the frame is bent or if any glue or glass remnants are left behind, the new display will not work properly. Replace the frame if it’s necessary.
*You can use a sheet of custom-cut double-sided tape to the back of the screen to secure the new screen.
*Time span: You may need 45 minutes-2 hours to fix the problem.
*Price range:


